Last year I wrote a post about Setting up a self-signed SSL certificate for localhost when using XAMPP on Windows, in it I outlined the steps I used to setup SSL for my localhost. I also mention at the time that I wasn’t using any virtual hosts. Well, a lot has changed in a year, and it has now become necessary for me to sometimes use virtual hosts. I therefore needed to tackle the issue of also setting up SSL for my virtual hosts. This post is an expansion of the original, covering how to setup self-signed SSL certificates for virtual hosts also. Setting up virtual hosts is another topic altogether that I will cover in another post.
In my previous post I mentioned that I run a lot of WordPress instances using localhost to access them eg
https://localhost/website1
I now also have some sites setup using virtual hosts so I access them using eg.
https://local.website1
This then meant that I needed self-signed SSL certificates for not just localhost but also for local.website1 etc.
Further to my previous post I also realised that these certificates are setup with a 365 day expiry (ie -days 365), so I need to repeat this process each year (or set a longer expiry).
The 8 Step Process
- Step 1 – Editing Config
- Step 2 – Write a Script
- Step 3 – Create the Certificates
- Step 4 – Install the Certificates
- Step 5 – Edit httpd-ssl.conf
- Step 6 – Edit httpd-vhosts.conf
- Step 7 – Restart XAMPP Services
- Step 8 – Test and Fix Firefox
Step 1 – Editing Config
For completness I have included this step, which I mentioned in my previous post. If you have previously setup self-signed SSL certificates you will have already done this.
Open C:\xampp\php\php.ini
For the SSL we are going to use openssl, so we need to make sure that the openssl line is not commented out. Ie remove the semi colon (;) in front of the line
extension=openssl
Save.
Now, open: C:\xampp\apache\conf\httpd.conf
Make sure that the rewrite_module is uncommented (ie no semi colon at the start of the line). For me, it was already uncommented.
LoadModule rewrite_module modules/mod_rewrite.so
Step 2 – Write a Script
Given that I am now needing to create more than 1 self-signed certificate and that I will be repeating this process each year, I decided it was easiest to create a bat file that I can just update and run each year.
In C:\xampp\apache create a file, I decided to call it makecert_bulk.bat given that is what it is going to do. Here is an example.
set XAMPPDIR=C:\xampp

set HOME=%XAMPPDIR%\apache\conf

set OPENSSL_CONF=%HOME%\openssl.cnf

if not exist %HOME%\ssl.crt mkdir %HOME%\ssl.crt

if not exist %HOME%\ssl.key mkdir %HOME%\ssl.key
set V3_EXT=subjectAltName=DNS:localhost,DNS:127.0.0.1,DNS:local.website1,DNS:local.website2

set DOMAIN=localhost

bin\openssl req -subj "/C=AU/ST=NSW/L=Sydney/O=Janette Towell/OU= /CN=%DOMAIN%" -x509 -addext %V3_EXT% -nodes -days 365 -newkey rsa:2048 -keyout %HOME%\ssl.key\%DOMAIN%-selfsigned.key -out %HOME%\ssl.crt\%DOMAIN%-selfsigned.crt
set DOMAIN=local.website1

bin\openssl req -subj "/C=AU/ST=NSW/L=Sydney/O=Janette Towell/OU= /CN=%DOMAIN%" -x509 -addext %V3_EXT% -nodes -days 365 -newkey rsa:2048 -keyout %HOME%\ssl.key\%DOMAIN%-selfsigned.key -out %HOME%\ssl.crt\%DOMAIN%-selfsigned.crt
set DOMAIN=local.website2

bin\openssl req -subj "/C=AU/ST=NSW/L=Sydney/O=Janette Towell/OU= /CN=%DOMAIN%" -x509 -addext %V3_EXT% -nodes -days 365 -newkey rsa:2048 -keyout %HOME%\ssl.key\%DOMAIN%-selfsigned.key -out %HOME%\ssl.crt\%DOMAIN%-selfsigned.crt
Some notes and explanations of the above script:
- This script assumes that your XAMPP has been installed in
C:\xampp, you may need to change this otherwise V3_EXTis a list of all the virtual hosts that you are using. I previously put this in theV3.extfile but having combined the openssl calls into 1 call I needed to pass these values differently as theopenssl reqcommand doesn’t supportextfilelikex509did, instead it passes key=value pairs via-addext- The only part of -subj value that is important is the value in
/CN= - You will need to change the value set for
DOMAINfor each virtual host you are using. So if you have more than 2 you will need to repeat theset DOMAIN=and the call tobin\openssl req ...lines. - If openssl is in your PATH you wont need
bin\in front of it.
Step 3 – Create the Certificates
Open a command prompt (eg from the Windows start menu type cmd in Windows search) then enter
cd /D C:\xampp\apache
Assuming you have installed xampp in C:\xampp\apache
Now enter:
makecert_bulk
Once this has completed successfully you will find all the private keys and certificates created in :
C:\xampp\apache\conf\ssl.crt
and C:\xampp\apache\conf\ssl.key
Step 4 – Install the Certificates
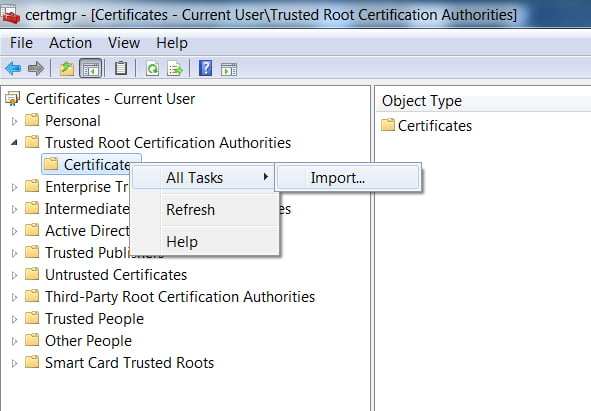
Go to start menu, type the following and press enter:
certmgr.msc
Double click “Trusted Root Certification Authorities”. Right click “Certificates”, choose All Tasks ->
Import…

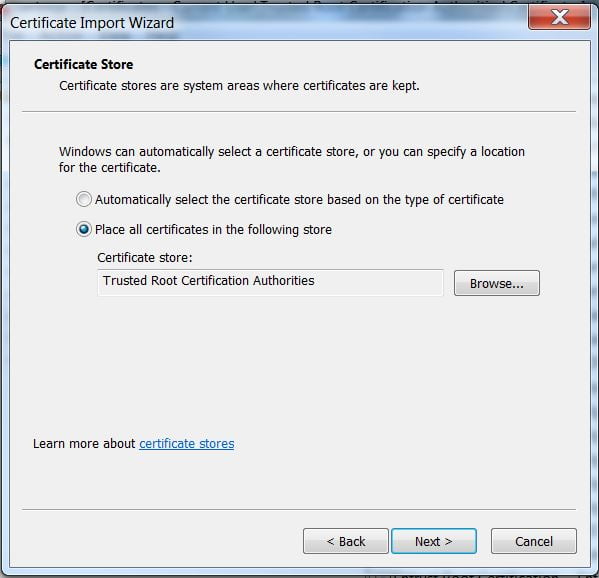
Click Next.
It will ask you to choose the certificate file. Click Browse and choose C:\xampp\apache\conf\ssl.crt
\localhost-selfsigned.crt

Click Next.
Next again,

then Finish.
This will bring you a message. Click Yes.
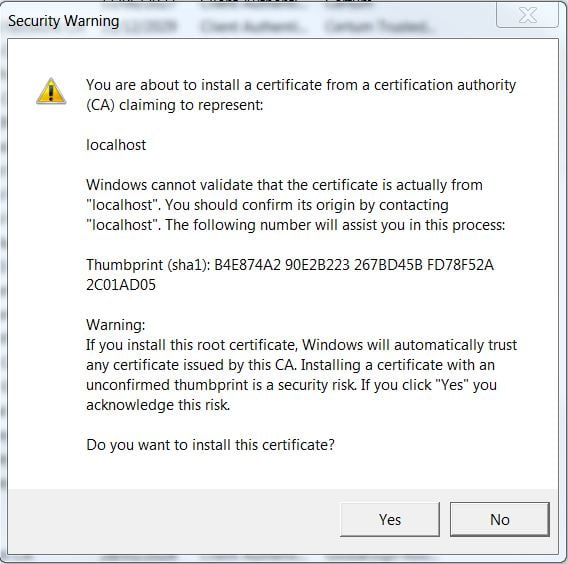
Then it should say Import was successful.

Click OK.
Repeat this step to install each of the certificates that you created for your virtual hosts.
Step 5 – Edit httpd-ssl.conf
We now need to tell Apache where to find all these certificates. To do this, we need to edit C:\xampp\apache\conf\extra\httpd-ssl.conf
Search for the section that sets the path to the SSLCertificateFile and SSLCertificateKeyFile ie it should look something like
SSLCertificateFile "conf/ssl.crt/server.crt"
and
SSLCertificateKeyFile "conf/ssl.key/server.key"
We need to add a line for each certificate and comment out the original, so it would then become :
#SSLCertificateFile "conf/ssl.crt/server.crt"

SSLCertificateFile "conf/ssl.crt/local.website1-selfsigned.crt"

SSLCertificateFile "conf/ssl.crt/local.website2-selfsigned.crt"

SSLCertificateFile "conf/ssl.crt/localhost-selfsigned.crt"
and
#SSLCertificateKeyFile "conf/ssl.key/server.key"

SSLCertificateKeyFile "conf/ssl.key/local.website1-selfsigned.key"

SSLCertificateKeyFile "conf/ssl.key/local.website2-selfsigned.key"

SSLCertificateKeyFile "conf/ssl.key/localhost-selfsigned.key"
Step 6 – Edit httpd-vhosts.conf
Next we need to update the virtual hosts file to force SSL and include the certificate information. Ie edit:
C:\xampp\apache\conf\extra\httpd-vhosts.conf
For example:
<VirtualHost *:80>
  ServerName localhost
  Redirect / https://localhost/

</VirtualHost>

<VirtualHost *:443>
  ServerName localhost
  DocumentRoot "C:/xampp/htdocs/"
  SSLEngine on
  SSLCertificateFile "C:\xampp\apache\conf\ssl.crt\localhost-selfsigned.crt"
  SSLCertificateKeyFile "C:\xampp\apache\conf\ssl.key\localhost-selfsigned.key"

</VirtualHost>
<VirtualHost *:80>
  ServerName local.website1
   Redirect / https://local.website1/

</VirtualHost>

<VirtualHost *:443>
  ServerName local.website1
  DocumentRoot "C:/xampp/htdocs/website1"
  SSLEngine on
  SSLCertificateFile "C:\xampp\apache\conf\ssl.crt\local.website1-selfsigned.crt"
  SSLCertificateKeyFile "C:\xampp\apache\conf\ssl.key\local.website1-selfsigned.key"

</VirtualHost>
<VirtualHost *:80>
  ServerName local.website2
  Redirect / https://local.website2/

</VirtualHost>

<VirtualHost *:443>
  ServerName local.website2
  DocumentRoot "C:/xampp/htdocs/website2"
  SSLEngine on
  SSLCertificateFile "C:\xampp\apache\conf\ssl.crt\local.website2-selfsigned.crt"
  SSLCertificateKeyFile "C:\xampp\apache\conf\ssl.key\local.website2-selfsigned.key"

</VirtualHost>
Step 7 – Restart XAMPP Services
From the XAMPP Control Panel, click stop and then once they are stopped, click start again.
This should enable https on localhost and each of your virtual hosts.
Step 8 – Test and Fix Firefox
Access https://localhost in your browser.
I found that it worked first time for Chrome, IE11, Safari 5.1.7 and Edge Version but for Firefox you get a warning message about a potential security threat, due to the fact localhost is using a self-signed certificate.
localhost uses an invalid security certificate.
The certificate is not trusted because it is self-signed.
Error code: MOZILLA_PKIX_ERROR_SELF_SIGNED_CERT

The way I found to fix this was to add a certificate exception in the Firefox settings:
Click on Tools menu then Settings
Click on Privacy & Security
scroll down to Certificates (almost at the bottom)
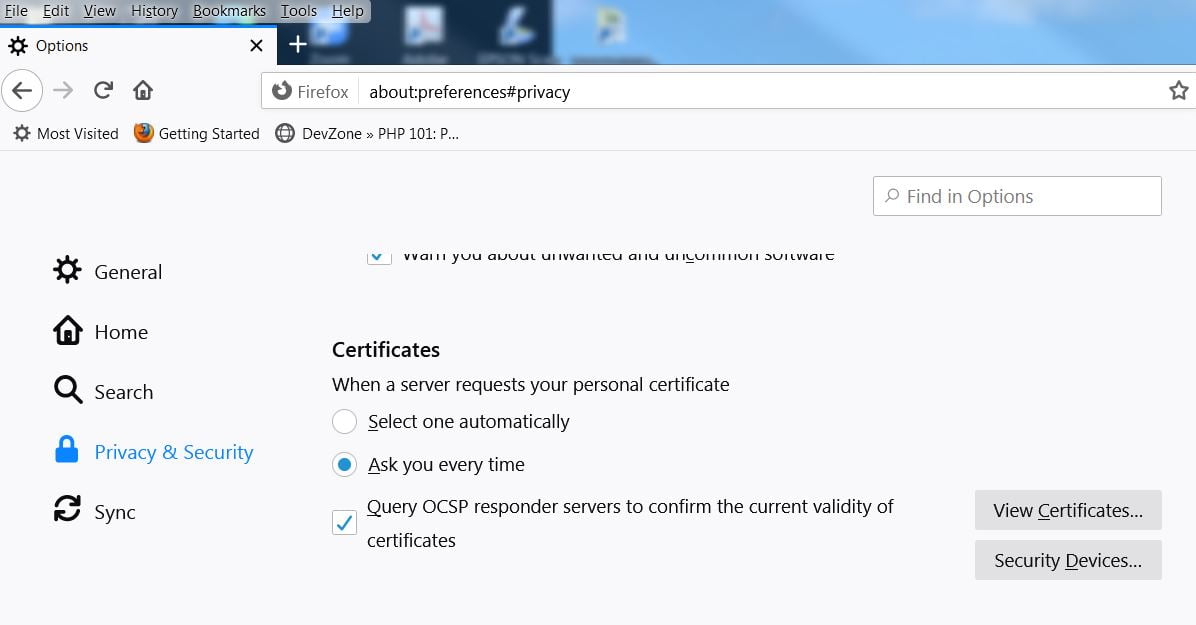
click on “View Certificates” button
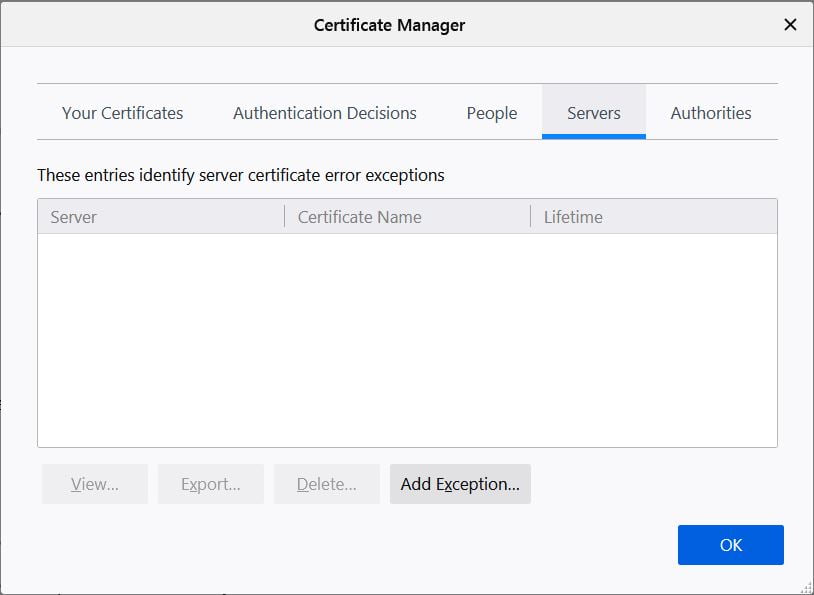
on the “Servers” tab click “Add Exception” button
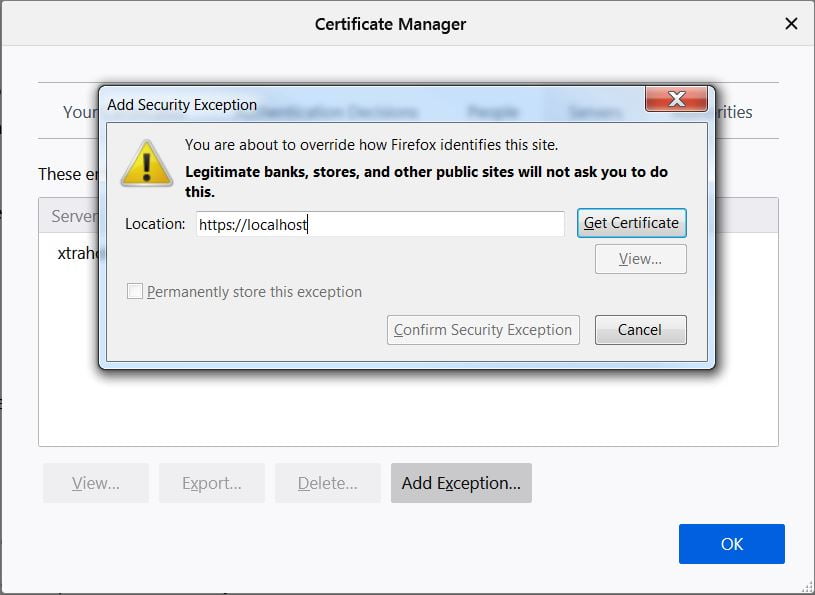
enter https://localhost and click “Get Certificate”
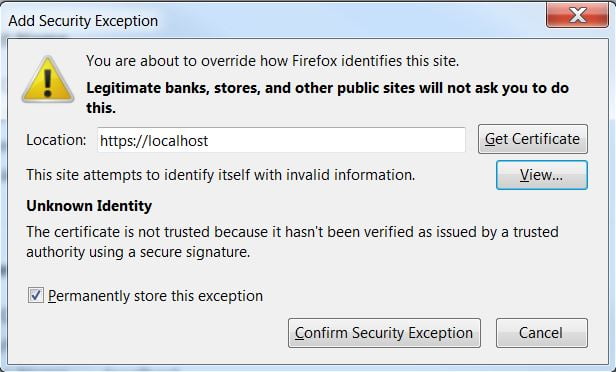
You get a warning message then, click “Confirm Security Exception”
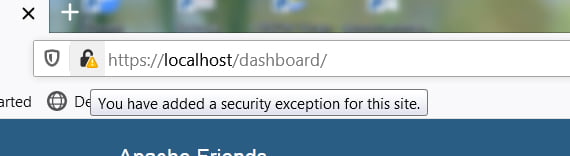
After adding the certificate exception for localhost, it should now look something like this.
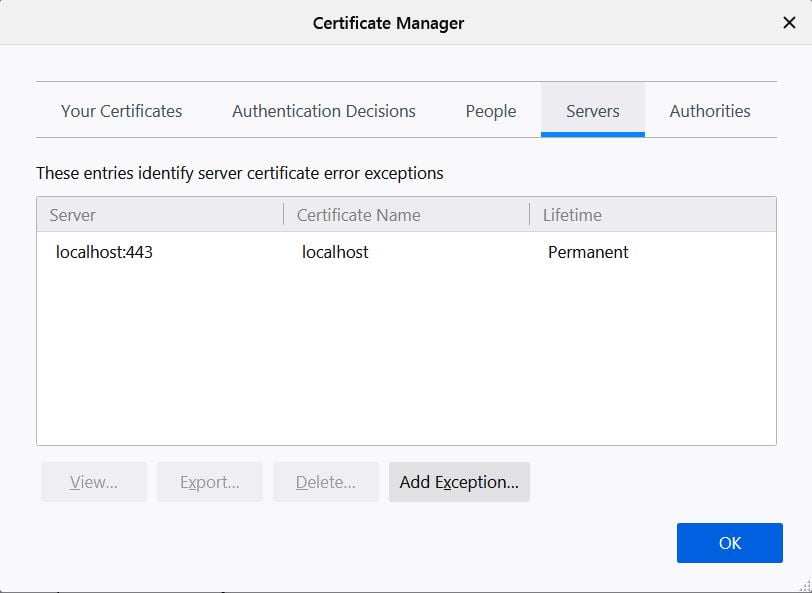
When you now try to access https://localhost you will still see a warning over the padlock but it now works.
You will need to repeat this for each of the virtual hosts certificates also.
Related Reading
As reference I used :
Very good teaching.
I got 3 sub domain websites with wildcard ssl working after a long searching of internet
Thank you very much for the expert step by step explanation